
groovin'
Building the game loop
Let's start by creating a main function that will act as the "master control" for the entire game. We will use setInterval to call our function 10 times per second. Many modern games run at 60 frames per second or even higher, but we are making Snake, which has a low framerate. We want the snake to pause after each movement to allow the player to input the next direction to turn.
function main() {

}

setInterval(main, 1000 / 10);
Now, let's create a function to update the game logic every frame, and another to render the current state of the game. We will call these functions from main.
function update() {

}

function render() {

}

function main() {
  update();
  render();
}

setInterval(main, 1000 / 10);
Render the game's grid
Let's start by moving our code to draw the color on the screen into the render function, and let's change the color to black.
function render() {
  // background
  ctx.fillStyle = "black";
  ctx.fillRect(0, 0, canvas.width, canvas.height);
}
Now, we need to create some variables to hold the grid. We already have the width and height of the canvas. Now, let's decide how wide we want the tiles to be. I chose 50 pixels.
const tileWidth   = 50;
const tileHeight  = 50;
In order to render a grid, we need to know how many tiles go on the x and y axis. Then, we can easily calculate the total number of tiles in the grid.
const tilesX      = Math.round(width / tileWidth);
const tilesY      = Math.round(height / tileHeight);
const totalTiles  = tilesX * tilesY;
I'd like a border in between each of the tiles in the grid; otherwise, the grid would look the same as our solid-blue background from earlier!
const borderWidth = 2;Now, let's return to the render function to draw our grid. Since we have a canvas that is 500 pixels in width and height, and tiles that are 50 pixels in width and height, we will have a 10x10 grid. In order to consecutively draw each tile, we will use for loops. If we write a single loop from 0 to tilesX, we will loop 10 times, which is enough iterations to draw a single row of tiles. Since we have a 10x10 grid, on each iteration of our loop in the x direction, we can loop from 0 to tilesY to draw an entire column of tiles.
function render() {
  // Draw background
  ctx.fillStyle = "black";
  ctx.fillRect(0, 0, width, height);

  // Draw grid
  for(let i = 0; i < tilesX; ++i) {
    for(let j = 0; j < tilesY; ++j) {
      // Draw each tile...
    }
  }
}Let's come up with the logic for how to draw each tile. We have all the variables we need to do it! We know that fillRect needs the x and y position, so let's calculate that first. The variable i holds the tile's position on the x axis from 0 - 9, and the variable j does the same thing in the y direction.

Question
Let's say we are on tile 2 in the x axis. Given that the tileWidth is 50 pixels, what is the x coordinate of this tile in pixels?
Answer
Don't forget that we want to add a border! Here is what the x and y position calculations look like in code.
let x = i * tileWidth + borderWidth;
let y = j * tileHeight + borderWidth;
We know the tileWidth and tileHeight, so we can just plug those in as the width and height arguments of the fillRect function, right? Not so fast! Remember that we want a border around each tile, so we need to consider that borderWidth as an offset.
let w = tileWidth - borderWidth * 2;
let h = tileHeight - borderWidth * 2;
Question
Woah, why are we multiplying the borderWidth by 2?

tileWidth
tileWidth - borderWidth
tileWidth - borderWidth * 2
Answer
Since we have offset the tile in the x and y direction by the borderWidth, we need to compensate by subtracting the borderWidth. However, subtracting once is only enough to make the tile not escape from it's 50x50 box. Subtracting the borderWidth twice will actually create the border effect on the bottom and right of our tile.
We've successfully figured out all of the math involved in drawing our grid! Now we just need to call the canvas APIs to draw these boxes.
function render() {
  // Draw background
  ctx.fillStyle = "black";
  ctx.fillRect(0, 0, width, height);

  // Draw grid
  for(let i = 0; i < tilesX; ++i) {
    for(let j = 0; j < tilesY; ++j) {
      // Calculate the x, y, w, h for each tile
      let x = i * tileWidth + borderWidth;
      let y = j * tileHeight + borderWidth;
      let w = tileWidth - borderWidth * 2;
      let h = tileHeight - borderWidth * 2;

      // Draw each tile
      ctx.fillStyle = "blue";
      ctx.fillRect(x, y, w, h);
    }
  }
}
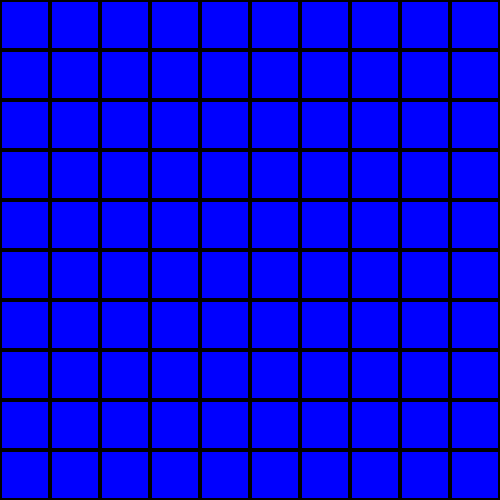
Way to go!
The grid is looking good, but it seems awfully empty. Ready to draw our player? I'll see you in the next chapter...