
groovin'
We're about to get into the weeds in this first section, but stay with me! The rest will be fun stuff, I promise!
Switching Tabs and Wreaking Havoc
With all of this talk in chapter 1 & 2 about time-based modelling and about utilizing the delta-time in between frames, my comment at the end of the last chapter where I mentioned creating a fixed timestep seems counterintuitive, right? Let's do an experiment. Run the game, and click to launch the ball. Then, as quickly as you can, switch to a new tab. Now: count to five. Click back into your old tab, and what do you see? Something impossible, most likely.
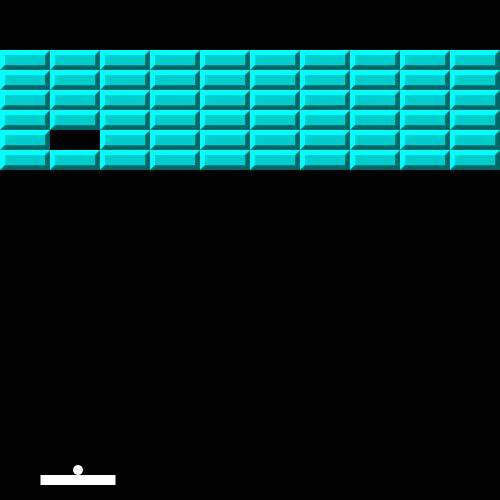 Firefox
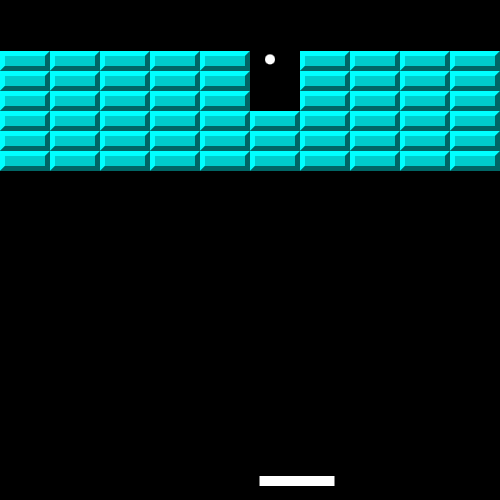 Chromium
In both browsers, I saw that the ball had phased through all or part of the brick wall, breaking bricks that were impossible to collide with. In Chromium, it's obvious that the tab was completely suspended, and when switching back to the tab, the dt was equal to 5 seconds, which placed our ball's position far outside the bounds of the canvas. Then, it got bounded to the canvas thanks to the code we wrote, and it appears on top of the wall of bricks. In Firefox, it seems as though the tab was not fully suspended, but it was running at an extremely low framerate, which explains why the ball made an impossible collision.
So we have a problem here, and there are a few ways people tend to fix it:
- Check the
dtvalue each frame to make sure it doesn't exceed some arbitary large value, like maybe one fourth of a second. - Don't use
dtat all. - Create a fixed timestep, and if the computer is running slowly, run multiple updates before rendering.
We are going to combine option 3 and a little bit of option 1.
Creating a Fixed Time Step
The first thing we need to set is our desired framerate. For this game, I want to pin it at 60 frames per second, but you could choose whatever you prefer. Then, we need to specify the max delta before the game essentially pauses. For this, I chose 3 frames. So on a device with low performance, the framerate can drop below 60 frames per second, but the game won't run any faster than the desired 60 frames per second.
const frameRate = 1 / 60;
const maxDelta = frameRate * 3;
let lastTimeStamp = 0;
let dt = 0;
Now, we need to adjust our main game loop. We bound dt to the maxDelta, but if the timeElapsed is lower than maxDelta, we add timeElapsed to the dt. Then, if dt is greater than the framerate of 60 fps, we need to update! So we call the update function and subtract the frameRate from dt. If dt is greater than the frameRate, we will need to update the simulation multiple times before rendering, to keep it in sync.
function main(timeStamp) {
  requestAnimationFrame(main);

  // timeElapsed is the time between the last and current frame.
  // The timestamps are in units of milliseconds. Divide by 1000 to get into units of seconds.
  let timeElapsed = (timeStamp - lastTimeStamp) / 1000;

  // Bound delta-time (dt) to the max allowed delta
  if (timeElapsed < maxDelta)
    dt += timeElapsed;
  else
    dt += maxDelta;

  lastTimeStamp = timeStamp;

  // Update the simulation as many times as needed
  while (dt > frameRate) {
    update(frameRate);
    dt -= frameRate;
  }

  // Render after update
  render();
}
On a computer with frame drops from time-to-time, the update will keep in sync so that the simulation will run at the same speed on a high-end computer, and on a laggy computer. However, if the game experiences a large delta-time, such as from switching tabs in the browser, it will only update the max allowed amount of times - in our case - three times.
Quick Book Plug
There are lots of similar implementations for this if you search the internet, but the method I went with is outlined in the book HTML5 Games: Novice to Ninja By Earle Castledine. I highly recommend it.
Visual Variety
Let's add some pizazz to our breakout game by taking a cue from the Atari game Arkanoid and give each row of bricks a different color! Here's the array of six colors that I chose.
const colors = [
  { light: "#f00", dark: "#600", color: "#c00" },
  { light: "#ff0", dark: "#660", color: "#cc0" },
  { light: "#0ff", dark: "#066", color: "#0cc" },
  { light: "#0f0", dark: "#060", color: "#0c0" },
  { light: "#00f", dark: "#006", color: "#00c" },
  { light: "#f0f", dark: "#606", color: "#c0c" },
];
Let's modify our number of bricksDown to reflect the number of colors, so if you want to add or remove colors, the number of rows will reflect that accordingly.
function setup() {
  // ...
  let bricksDown = colors.length;
  // ...
}
Adjust the render function to use the colors from our array instead of the hardcoded colors we had in the last chapter. Now our game has some visual variety!
function render() {
  // ...
  for (let brick of bricks[i]) {
    // ...
    ctx.fillStyle = colors[i].color;
    // ...

    // Top left polygon
    ctx.fillStyle = colors[i].light;
    // ...

    // Bottom right polygon
    ctx.fillStyle = colors[i].dark;
    // ...
  }
}
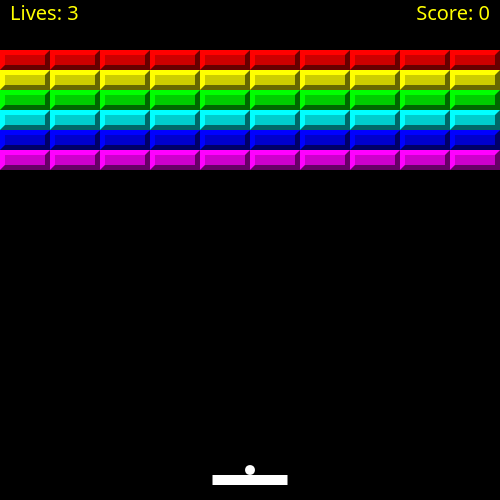
Keeping Score
Most arcade games display the score and lives at the top of the screen, but we aren't actually keeping score right now. Let's fix that by adding a new global variable score, initializing it in the setup function, and updating the score each time a brick is broken. I arbitrarily chose to award 100 points for each brick that's broken.
let score;

function setup() {
  // ...
  score = 0;
}

function update(dt) {
  // ...
  for (let i = 0; i < bricks.length; ++i) {
    for (let j = 0; j < bricks[i].length; ++j) {
      // ...
      if (collision) {
        score += 100;
        // ...
      }
    }
  }
}
Rendering Score and Lives
We've dutifly kept track of the score and player.lives so far. Now comes the time to render them to the screen so the player can see what's going on! I added this code to the bottom of the render function to draw the player's lives in the top-left of the screen, and the score to the top-right of the screen.
function render() {
// ...
ctx.font = "20px sans-serif";
ctx.fillStyle = "yellow";
ctx.textAlign = "left";
ctx.fillText(`Lives: ${player.lives}`, 10, 20);
ctx.textAlign = "right";
ctx.fillText(`Score: ${score}`, width - 10, 20);
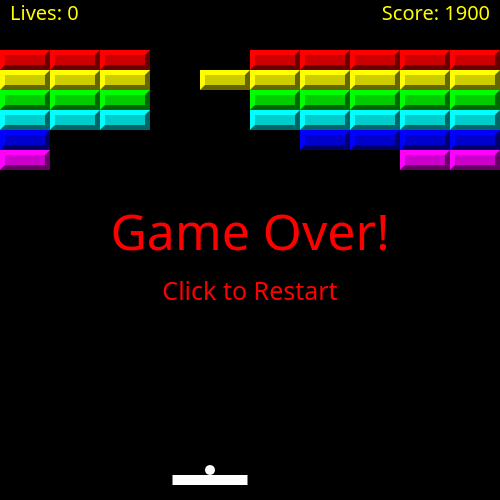
}Game Over
Now it's finally time to implement the win and lose screens if the game is over! First, let's render it to the screen. We use the ternary operator to determine whether to display "You Win!" or "Game Over!" Then, we draw the text to the center of the screen and add a message "Click to Restart" fifty pixels below it. We could draw a background on the screen, but I like drawing the text on top of the paddle and ball sitting in their last positions.
function render() {
  // ...
  if (gameOver) {
    ctx.font = "50px sans-serif";
    ctx.fillStyle = "red";
    ctx.textAlign = "center";
    let text = brokenBricks == totalBricks ? "You Win!" : "Game Over!";

    ctx.fillText(text, width / 2, height / 2);
    ctx.font = "25px sans-serif";
    ctx.fillText("Click to Restart", width / 2, height / 2 + 50);
  }
}
Since we're telling players to click to restart, we'd better figure that out... In the update function, we can check whether the game is over, and if it is, we restart the game when the mouse is clicked. Regardless, if the game is over, we should return from the update function without updating any of the game physics.
function update() {
  // Check if the game is over or not
  if (gameOver) {
    if (mouse.click) {
      setup();
    }
    return;
  }
}
Since the user is going to be clicking to restart the game, we need to set mouse.click = false in startup to prevent the ball from immidiately launching.
function setup() {
  gameOver = false;
  mouse.click = false;
}
Creating Sound Effects
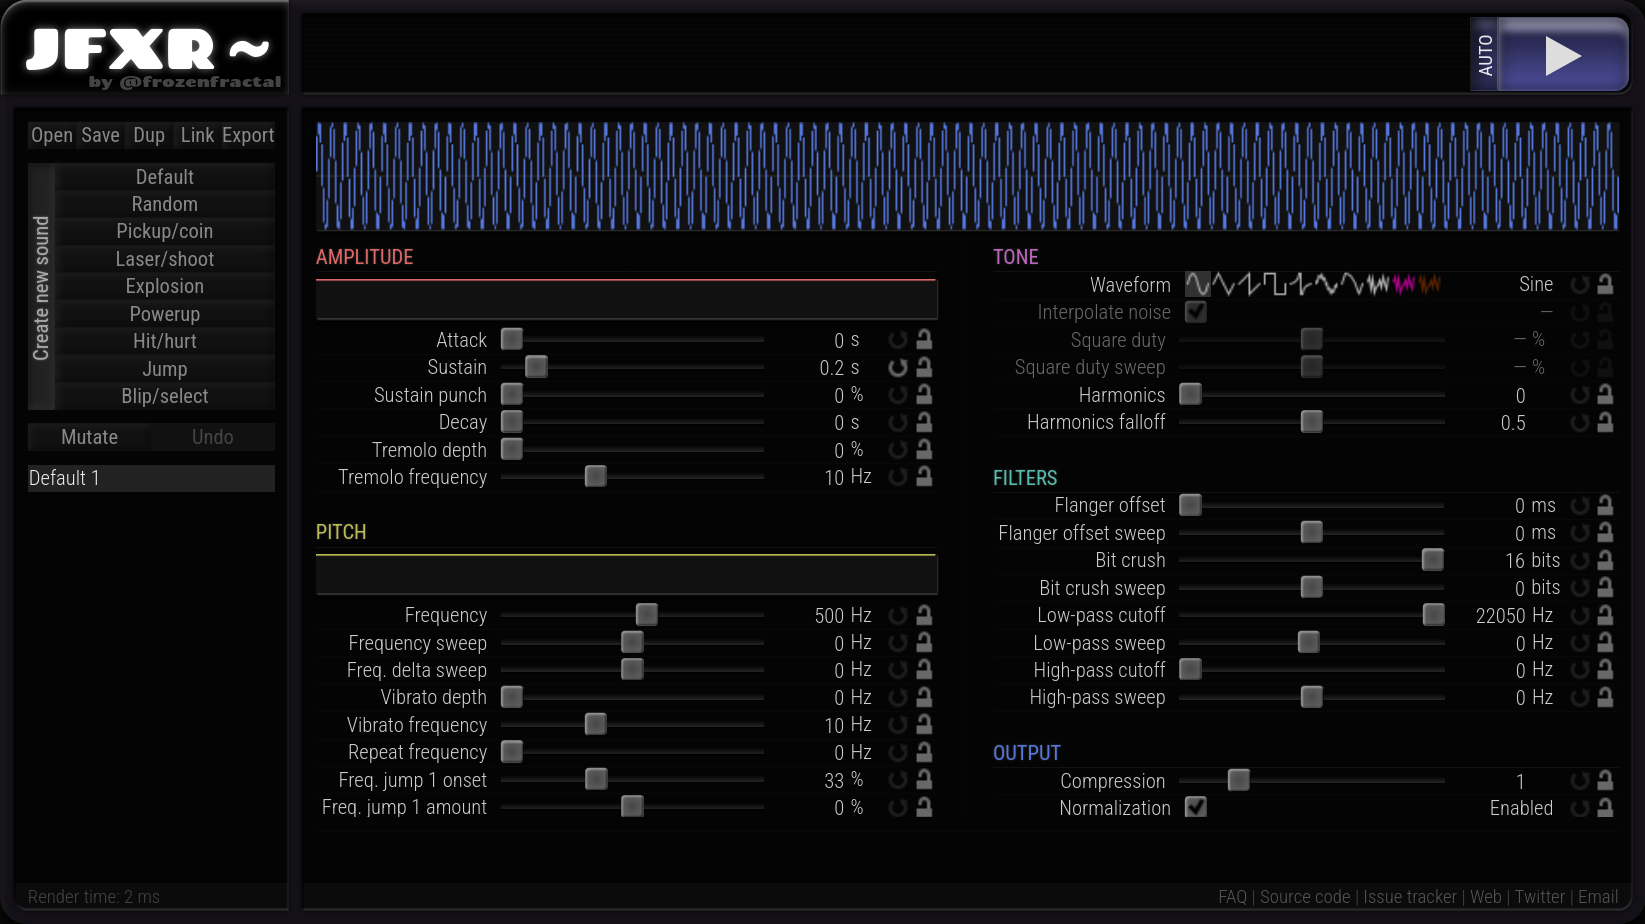
I used the wonderful JFXR website to create these sound effects! They are all public domain, so you can use them for whatever you want. JFXR is a really cool program that was inspired by sfxr and bfxr. It has several presets, a mutator function, and the ability to tweak as many variables as your heart desires! If you don't know what you're doing, but want to get a taste for what it can do, just hit the "random" button a bunch, and you might hear something you like.
Playing Sound Effects
Delving into the world of the Web-Audio API is something that I want to do justice to in a separate tutorial. It is the best way to implement music and sound effects for web games, but it is certainly not the simplest. I'm going to outline a method that I've used before which is a quick way to get sound effects into your game.
Let's start by creating our sfx object. We need to add the paths to your sound effects. These are the sound effects I provided in the breakout repo. Then, I created a simple play function that accepts a path, loads an Audio Element and plays it. We also implemented a preload function that fetches the audio immidiately after the script loads so that it will be cached and ready to go in the user's browser. Otherwise, the player may experience some lag while the sound effect loads for the first time.
const sfx = {
  shoot:         "../sfx/shoot.ogg",
  paddle_bounce: "../sfx/paddle-bounce.ogg",
  wall_bounce:   "../sfx/wall-bounce.ogg",
  brick_break:   "../sfx/brick-break.ogg",
  lose:          "../sfx/you-lose.ogg",
  win:           "../sfx/you-win.ogg",
  play: function(url) {
    let audio = new Audio(url);
    audio.play();
  },
  preload: function() {
    new Audio(this.shoot);
    new Audio(this.paddle_bounce);
    new Audio(this.wall_bounce);
    new Audio(this.brick_break);
    new Audio(this.lose);
    new Audio(this.win);
  }
};
Make sure to call the preload function before the setup function at the bottom of the file.
sfx.preload();Couldn't the play function be optimized?
I am intentionally loading the Audio element each time that play is called, because it will create a new audio channel so that two of the same sound effects can be played and heard at the same time. If we had one Audio element for the wall_bounce, we would have to stop the old sfx from playing to start a new one if the ball hit a corner. Luckily, browsers cache audio, so the actual fetching of the audio from the url becomes a performance non-issue after the first load.
Now, we need to edit the update function to play all of these awesome sound effects. Note the many uses of // ... to explain that I am omitting code. I'm just trying to show where I started the sound effects.
function update(dt) {
  // ...

  // Activate the ball
  if (mouse.click && !ball.active) {
    ball.active = true;
    ball.velocity.y = -ball.speed;
    sfx.play(sfx.shoot);
  }

  // ...

  // Bound the ball left
  if (ball.x - ball.r < 0) {
    ball.x = ball.r;
    ball.velocity.x *= -1;
    sfx.play(sfx.wall_bounce);
  }
  // Bound the ball left
  else if (ball.x + ball.r > width)
  {
    ball.x = width - ball.r;
    ball.velocity.x *= -1;
    sfx.play(sfx.wall_bounce);
  }
  // Bound the ball top
  if (ball.y - ball.r < 0) {
    ball.y = ball.r;
    ball.velocity.y *= -1;
    sfx.play(sfx.wall_bounce);
  }
  // Falls below player
  else if (ball.y - ball.r > height) {
    --player.lives;
    if (player.lives == 0) {
      gameOver = true;
      sfx.play(sfx.lose);
    }
    ball = new Ball(playerCenter, player.y);
  }

  // Ball hits paddle
  if (ball.x + ball.r > player.x &&
    ball.x - ball.r < player.x + player.w &&
    ball.y + ball.r > player.y &&
    ball.y + ball.r < player.y + player.h)
  {
    // ...
    sfx.play(sfx.paddle_bounce);
  }

  // Ball hits brick
  loop:
  for (let i = 0; i < bricks.length; ++i) {
    for (let j = 0; j < bricks[i].length; ++j) {
      // ...

      if (collision) {
        bricks[i][j] = 0;
        score += 100;
        ++brokenBricks;

        // If all bricks have been cleared, the player won!
        if (brokenBricks == totalBricks) {
          gameOver = true;
          sfx.play(sfx.win);
          return;
        }

        sfx.play(sfx.brick_break);

        // ...
      }
    }
  }
}
We Did It!
It's a wonderful thing to create a game from scratch, isn't it? Hopefully you learned something that you can bring to your next game project, or maybe you could even use this as the base for your own creativity-fueled browser-based breakout game! In any case, feel free to check out my other work here on Scipress, codepen, and codeberg