Hello World
Let's make a post.
First, open Scipress in a new tab
This creates a new post and redirects you to its edit page. The post should be initialized with some starter content to get your creative juices flowing. In fact, every time you click the New post buton, Scipress creates a new post from a random template.
These random templates help us introduce cool new features. Plus, it's easier to start writing from a template than a blank page.
Post structure
You may have noticed that posts follow a similar structure -> metadata at the top and content below. For example, our Golden Retriever post template looks like this 👇
---
title: Why Dogs Are Man's Best Friend
description: Dogs - they're like humans but better.
slug: why-dogs-are-mans-best-friend
is_draft: true
icon: dog
tags:
- pets
- dogs
- lifestyle
---

*Dogs*, our loyal companions, embody _unconditional love_ and _empathy_. Their unwavering loyalty and understanding create deep bonds with humans. Their versatility as working partners throughout history, from herding livestock to aiding those with disabilities, has been invaluable. Beyond companionship, dogs offer health benefits, reducing stress and lowering blood pressure. Cherish these remarkable creatures for their unwavering devotion and positive impact on our lives.
## Reasons why dogs are man's best friend:
- Unwavering loyalty and companionship
- Unconditional love and empathy
- Versatility as working partners
- Health benefits, reducing stress
**Dogs truly deserve the title "man's best friend."**The stuff at the top, between the dashed lines is called YAML frontmatter. It defines information about a post. The content below the YAML frontmatter is the post body. The post body is written in Markdown. Scipress transforms your Markdown into HTML and renders it as the text and images you see on your screen.
YAML frontmatter
YAML (YAML Ain't Markup Language)
YAML is a "human-readable data serialization language" that's widely used for configuration files.
Every post must contain YAML frontmatter with these two required fields
title: The title of the postis_draft: (true/false) Whether or not this post is a draft
Additionally, Scipress supports optional fields such as
description: a description of the post used for search and SEOtags: a list of keywords used for search and SEOfeature_image: an image that that appears when the post is shared on external platforms like Reddit, Facebook, X, etc.restrict_access: a list of user ids and/or email addresses that grant specific users access to the post
You can browse our complete list of YAML frontmatter fields here ->
Post body (Markdown)
Posts are written in Markdown - a syntax widely used to write content for the web. Markdown's key feature is that it's easy to read and write. For example,
---
title: Basic Markdown
is_draft: true
---

# This is a level-1 header
And here's some basic text

## This is a level-2 header
And here's some more text with **bold content** and _italic content_.

```
This is a block
of code
```

And here's an **unordered** list:

- foo
- bar
- baz
Try it
Create a new post, then replace its content with the code above 👆
You can click the
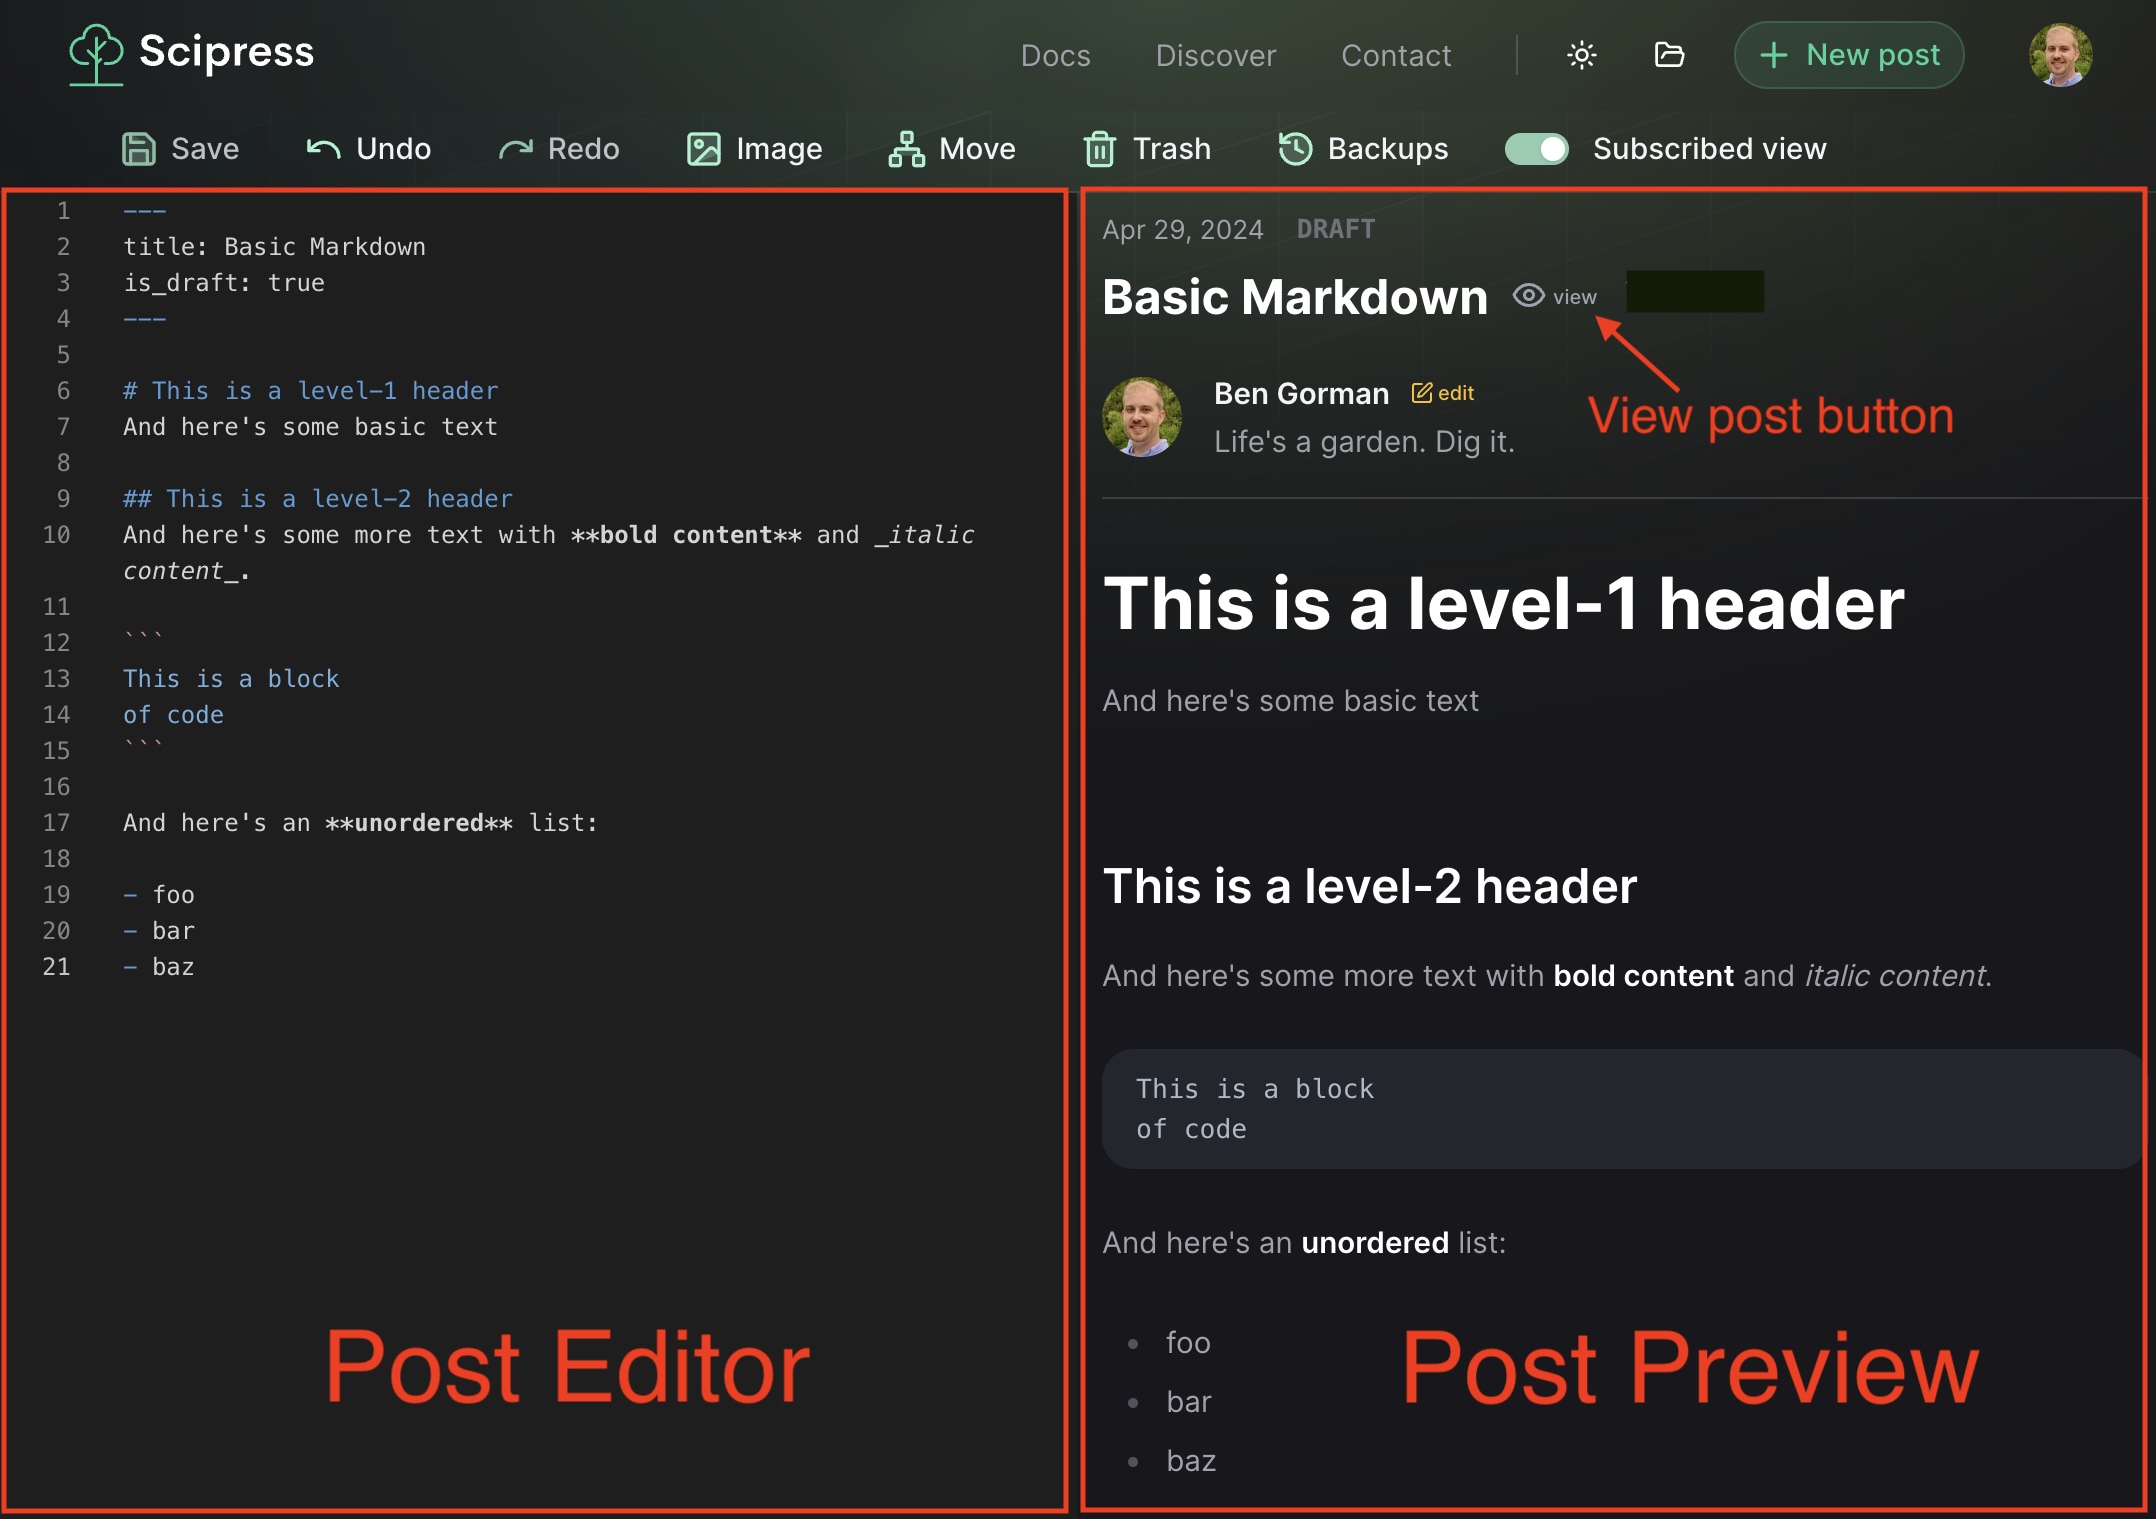
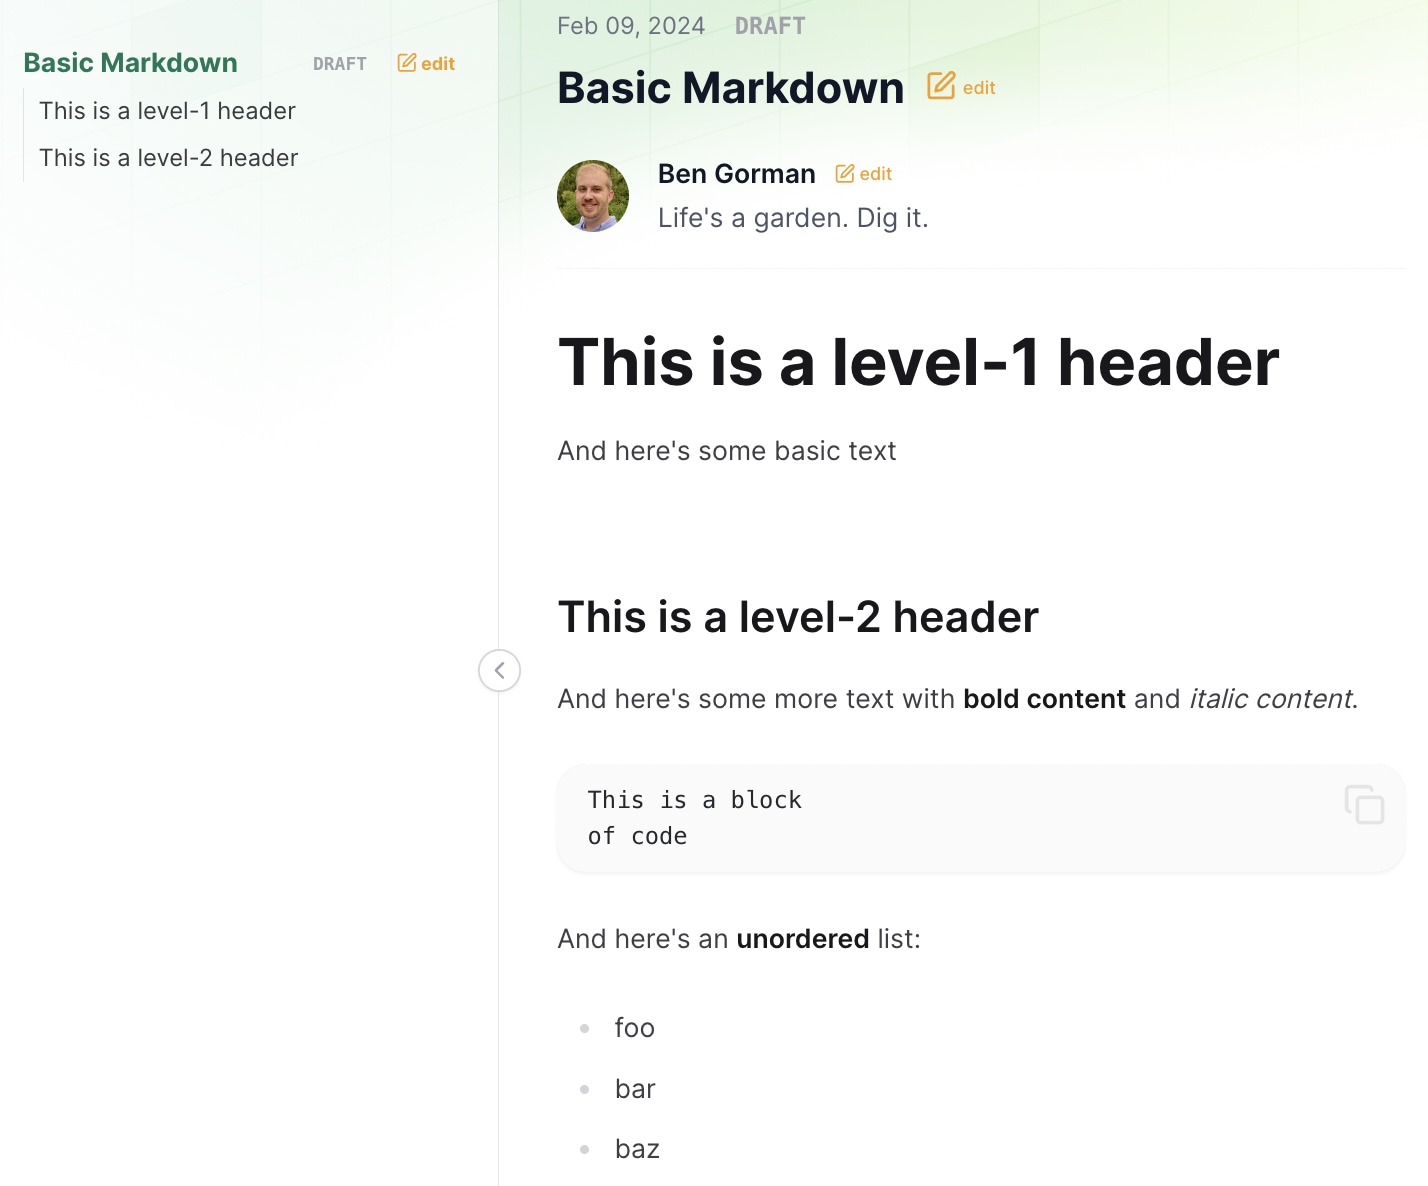
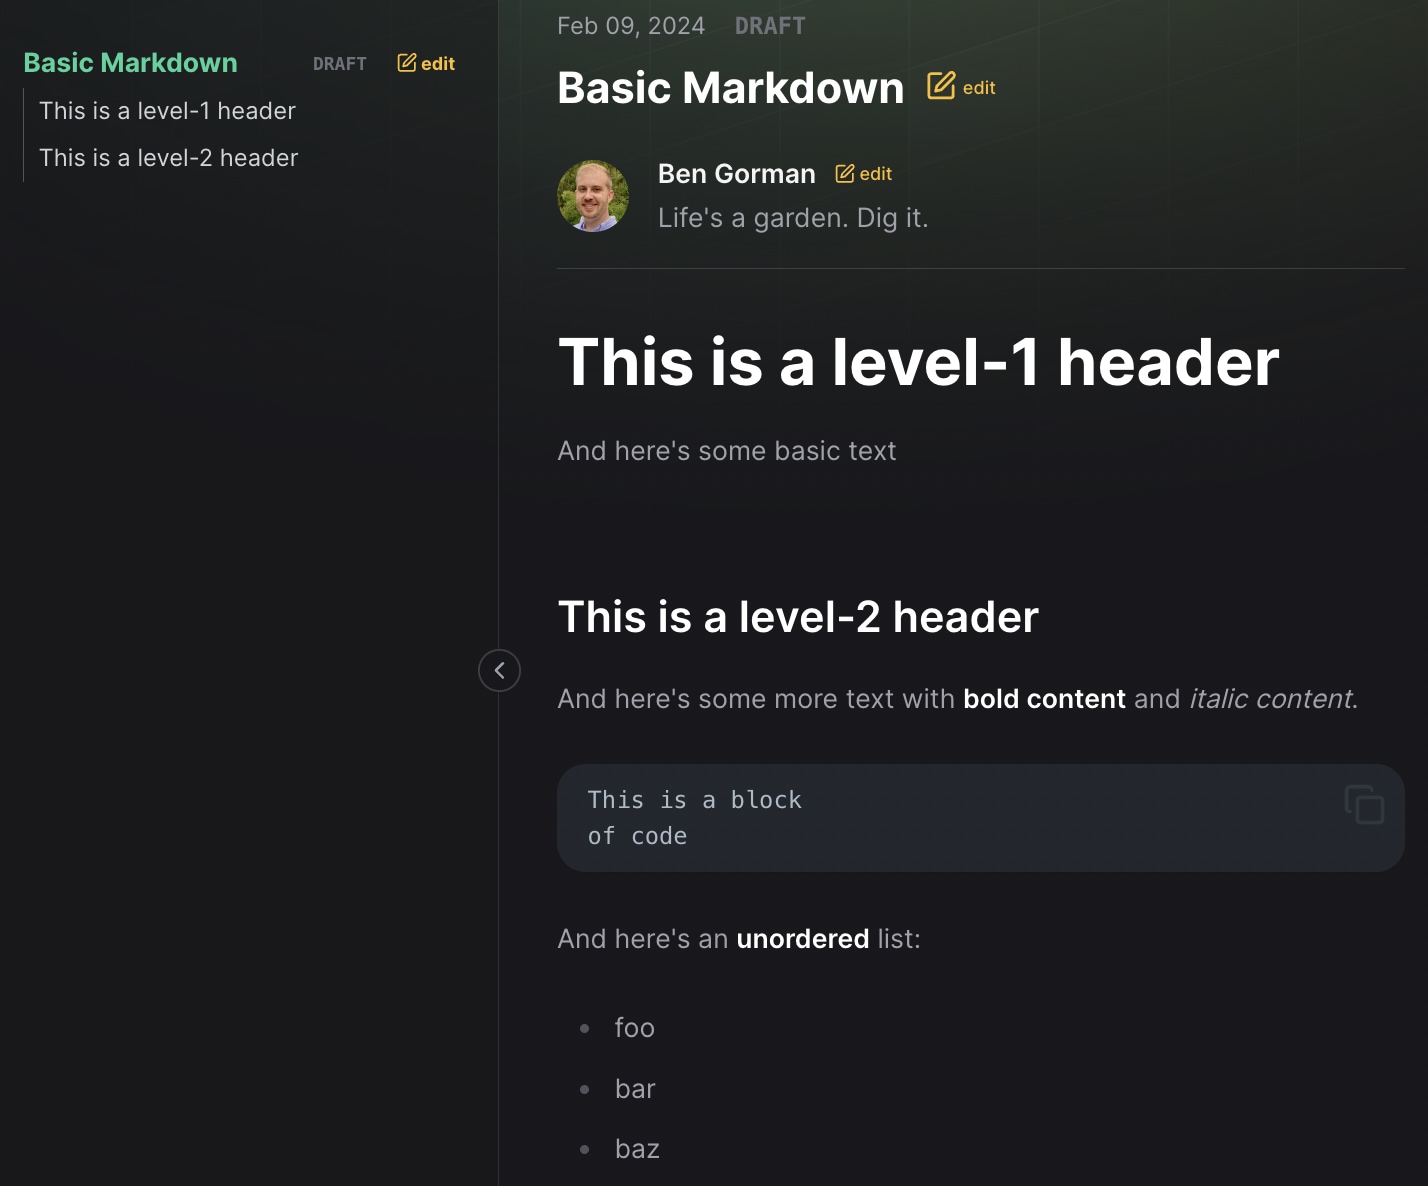
Notice how Scipress automatically generates the navigation for this post based on its headers.
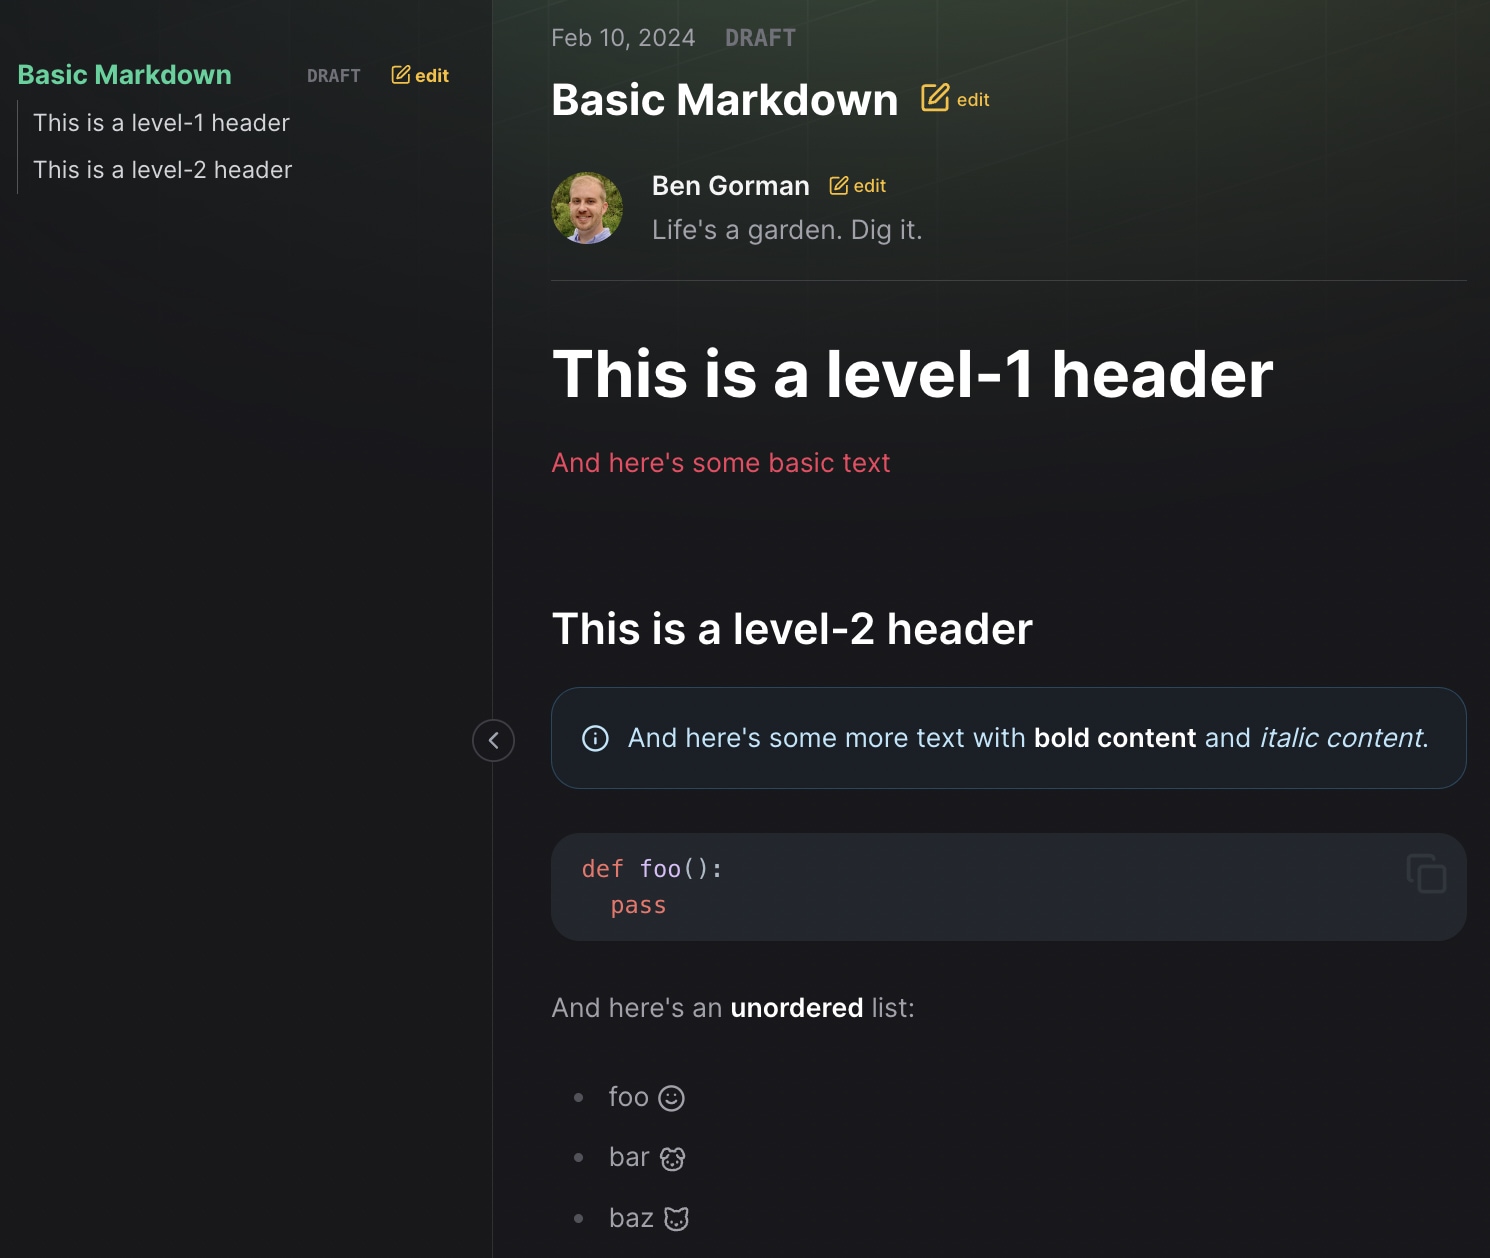
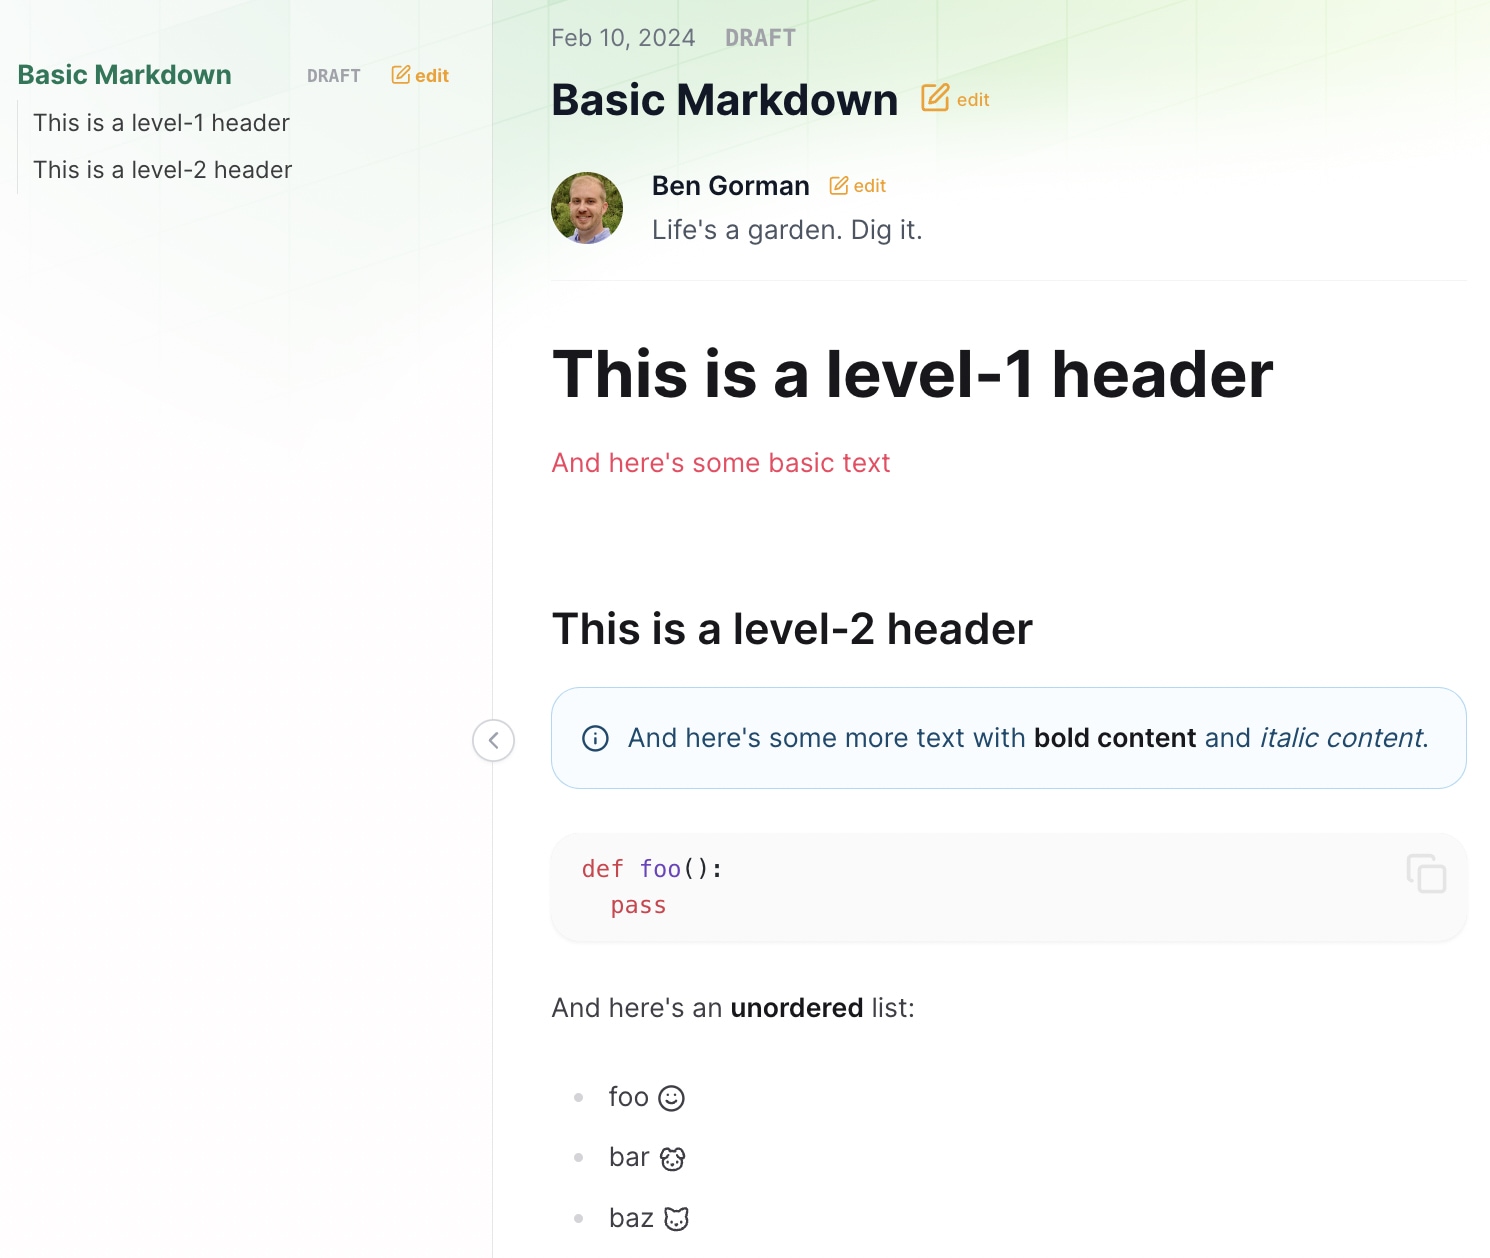
Scipress enhances vanilla Markdown with additional features like Tailwind CSS, admonitions, and icons. For example, you could spruce up the previous post like this.
---
title: Basic Markdown
is_draft: true
---

# This is a level-1 header
:span[And here's some basic text]{.text-rose-500}

## This is a level-2 header
:::info
And here's some more text with **bold content** and _italic content_.
:::

```python
def foo():
  pass
```

And here's an **unordered** list:

- foo :icon[smile]
- bar :icon[dog]
- baz :icon[cat]
Why is Markdown better than a visual editor?
- With Markdown, you can copy-paste an entire post. This means you can duplicate a post, share a post, save a post on your hard-drive, find & replace anything, etc.
- Visual editors can be buggy, slow, and require more compute resources
- It's harder to implement new features into visual editors
- It's easier and faster to write in Markdown
- You can write Markdown in any text editor, even offline
Want to learn more about Markdown? See our Markdown guide ->
Post operations
Follow along with the steps below to learn how to open, trash, restore, and move a post.
1. Open a post
Presumably you've already created a post or two.. To open a post that you previously created, click the folder icon in the page header. Then click the post you want to edit.
2. Trash a post
In the edit post page, you should see a Trash button in the editor navbar. Click it.
At this point, the post is considered "in the trash". You cannot edit it and other people cannot view it. However, the post still exists, and you have the option to restore it.
Trash vs Delete
Throughout Scipress, we use the following convention.
- trashing an object means "users should consider this thing deleted, but the data still exists and it can be restored."
- deleting an object means "this thing is gone forever."
3. Restore a trashed post
Oops! Maybe we shouldn't have trashed that post in Step 2. Restore it by clicking the Restore button in the editor navbar.
Can't find the post you trashed?
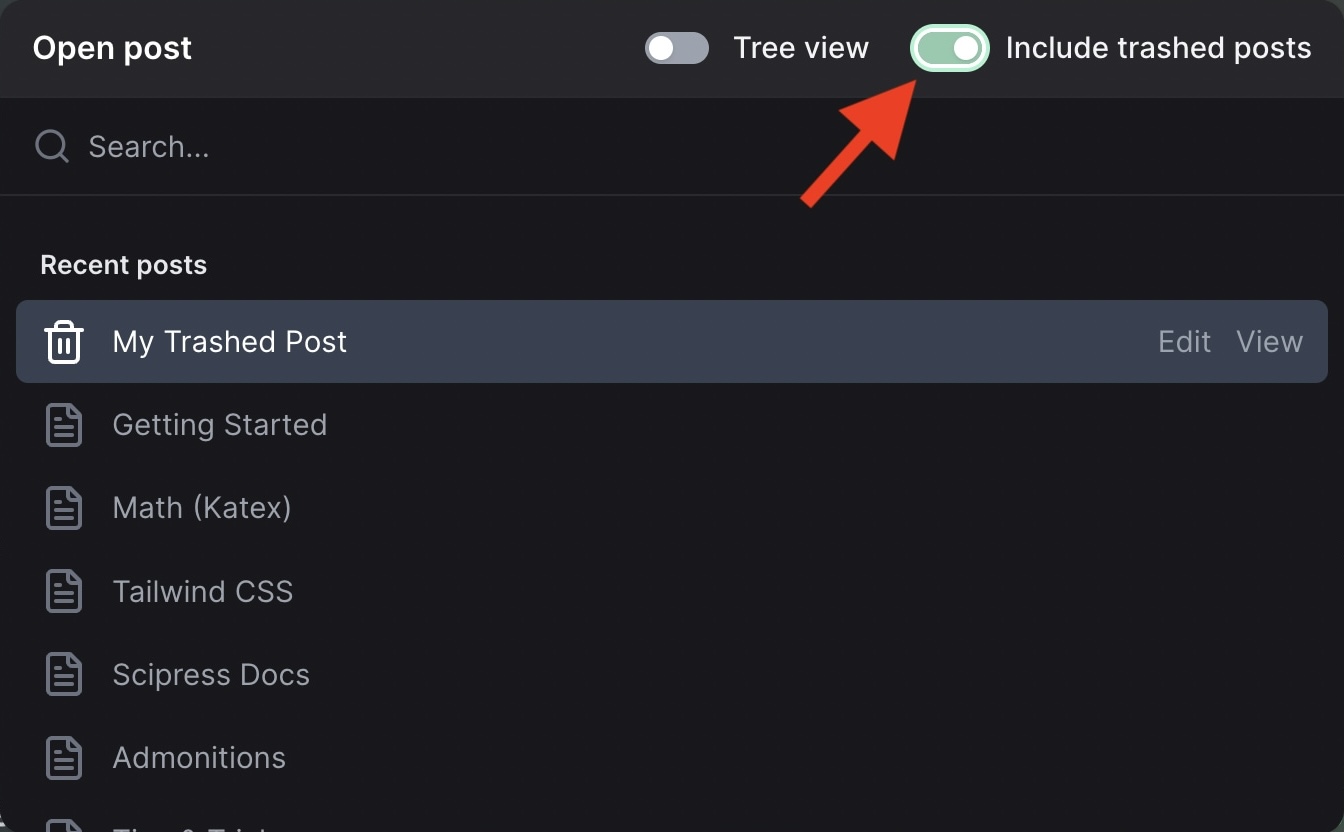
If you navigated away from the edit post page after you trashed it, you might have trouble finding your way back. If so, click the Open Post folder icon in the page header, then activate the Include trashed posts toggle.
4. Restore post from a backup
If you screw up your post, you can always restore a previously saved version.
Try it
Smash some keys, then save your unwanted edit. Now click the Backups button in the post navbar. Then choose the backup you want to restore.
5. Move a post
Next, let's create a second post and move it below our first post.
- Click the New post button
- Click the Move button in the editor navbar
- Confirm that below is selected as the direction
- Click the post you just modified in Step 4
This connects the posts such that the first post becomes the parent of the second post. When viewing either post, the navigation should show both posts.
Post Id & URL
Every post is assigned a unique, random ID that's used to generate two unique web pages:
- The edit post page. (E.g.
scipress.io/post/mYpOstId123/edit) - The view post page. (E.g.
scipress.io/post/mYpOstId123/my-post-slug)
In the example above,
mYpOstId123is the unique post idmy-post-slugis the post slug
By default, a post's slug is its title in kebab-case, but you can change it to something different via the slug property in the YAML frontmatter.
Slugs provide context about a webpage in its URL.
Post trees
Through the process of moving posts above, below, or adjacent to each other, you can create a post tree, like this
         Post A
         /    \
    Post B    Post C
              /   \
         Post D   Post E
The navigation for this particular tree would then look like this
- Post A
  - Post B
  - Post C
    - Post D
    - Post E
This is useful if you want to organize posts, for example, into a book. Post trees also allow you to grant and restrict access to content in a natural and efficient manner. We'll discuss this more in the Access Control section below 👇
Every post belongs to exactly one post tree, and every post tree has a single post at the top of the tree called the root post. (These are upside down trees 🤷♂️)
Bulk editor
The bulk post editor lets you create, edit, and trash multiple posts at the same time. To open the bulk editor, click your profile icon at the top right of the page header, then click Bulk Editor.
The bulk editor allows you to modify posts' metadata using YAML. Note that you cannot edit a post's body from within the bulk editor.
You can create a post by listing it with a title.
- title: My Post
You can trash a post by removing it from the bulk editor.
You can rearrange and nest posts using the posts property.
- title: Post A
  id: ABC123XYZ
  is_draft: true
  posts:

    - title: Post B
      id: XYZ987ABC
      is_draft: true
What happens if you remove a post's id?
If you remove a post's id, but not its title, the bulk editor will trash the original post and create a second, new post with the same title. The new post will get a new, unique id.
Access Control
Scipress has a powerful mechanism for granting and restricting users' access to content. To illustrate, consider the following post tree.
         Post A
         /    \
    Post B    Post C
              /   \
         Post D   Post E
Drafts
When you create a new post, it's initialized as a draft. Drafts are only visible to the post author and Scipress admins. Furthermore, the descendants of a draft are also only visible to the post author and Scipress admins, even if those posts are not drafts themselves.
For example, in the post tree below,
             Post A
        is_draft: true
            /      \
           /        \
          /          \
     Post B         Post C
is_draft: false  is_draft: false
                    /         \
                   /           \
              Post D          Post E
         is_draft: false   is_draft: true
none of the posts are publicly viewable because the root post is a draft and every other post is a descendant of it. If you were to set is_draft: false on the root post...
             Post A
        is_draft: false
            /      \
           /        \
          /          \
     Post B         Post C
is_draft: false  is_draft: false
                   /         \
                  /           \
             Post D          Post E
        is_draft: false   is_draft: true
posts A, B, C, and D would be publicly viewable. Post E would remain hidden from public view because it's still labeled as a draft.
Restricted posts
You can restrict access to a post via the restrict_access frontmatter field. For example, if your post frontmatter looks like this
___
title: Something
is_draft: false
restrict_access: [[email protected], [email protected], Xy123dj3]
___
then only you (the author), Scipress admins, and the three users you've specified can view the post. In this case, those three users are
- the user whose email address is [email protected]
- the user whose email address is [email protected]
- the user whose id is Xy123dj3
As illustrated here, you can provide a user's email address or their user id to grant them access.
If you grant a user access to a post via their email address, it needs to be the same email address they used to create their account and their email needs to be verified.
If this post was a draft then it would not be visible to Bob, Sue, and user Xy123dj3.
Now let's revisit our post tree from earlier and assume none of the posts are drafts.
         Post A
         /    \
    Post B    Post C
              /   \
         Post D   Post E
What if we...
- set
restrict_access: [AbC, dEf, GhI]on post C - set
restrict_access: [dEf]on post E - exclude the
restrict_accessproperty from all other posts
             Post A
            /      \
           /        \
          /          \
     Post B         Post C
               restrict_access: [AbC, dEf, GhI]
                   /         \
                  /           \
             Post D          Post E
                        restrict_access: [dEf]
In this case,
- posts A and B would be visible to everyone.
- posts C and D would be visible to users AbC, dEf, GhI.
- post E would be visible to user dEf.
There are two important rules to remember regarding restrict_access
- If the root post doesn't have the
restrict_accessproperty defined in its frontmatter, everyone can see it. - The users who can see post X are the ones who can see its parent, intersected with the ones listed in its
restrict_accessproperty.
Confused? No worries! We discuss this in greater detail and with examples in the Access Control guide ->.
Note
When a post is restricted, not only are its content unviewable by unauthorized users but so is its metadata. For example, if user AbC was reading Post C in the post tree above, they would see the following navigation
- Post A
  - Post B
  - Post C
    - Post D
Not only are they restricted from accessing post E, they don't even know it exists.
Paywalls (gated content)
Paywalls (i.e. gates) allow you to hide snippets of content from users, except users who are subscribed to a post. Scipress makes gating content super easy. Just wrap the content you wish to protect in a gate tag like this
---
title: Hilarious jokes
is_draft: true
---

# Why did the chicken cross the road?

:::gate
To get to the other side.
:::
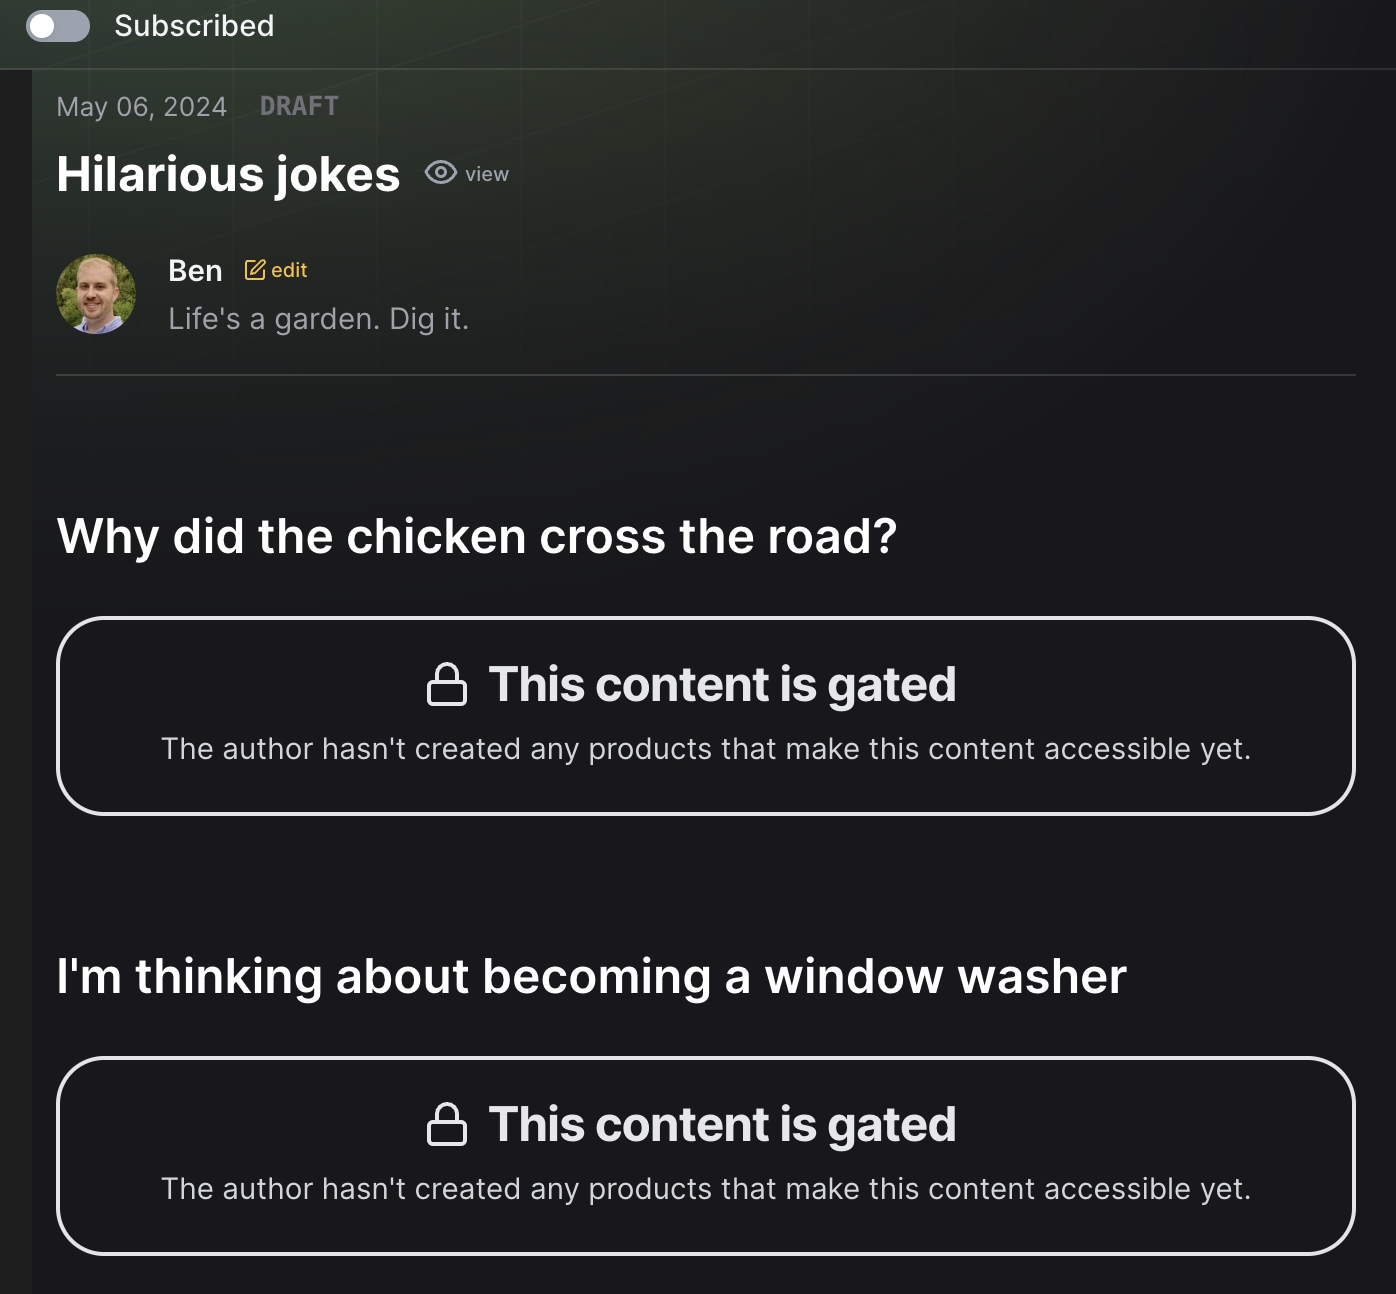
In the edit post page, observe the Subscribed view toggle in the navbar. This allows you to view your post from the perspective of users who are subscribed and users who aren't.
You can even gate multiple pieces of content within a single post.
---
title: Hilarious jokes
is_draft: true
---

## Why did the chicken cross the road?

:::gate
To get to the other side.
:::

## I'm thinking about becoming a window washer

:::gate
It's something I could really see myself doing
:::
You can set up digital products that readers can subscribe to, to unlock these gates. Unsubscribed readers will see the products in front of the gates they unlock.
Products
You can create one or more digital products that grant users access to gated content.
Before you can create and sell products, you need to register as an authorized seller. Go to your author dashboard to get started.
When you create a product, you can select up to 8 posts that it unlocks directly. (By unlock, we mean all gated content within the post is displayed to the reader.) If a product unlocks post X directly, it also indirectly unlocks all the gated content within X's descendant posts.
     Post A   <--- MyProduct unlocks post A directly
     /    \
Post B    Post C  <--- B & C are unlocked indirectly
          /   \
     Post D   Post E  <--- E & D are unlocked indirectly
If the author reorganizes the post tree like this
     Post B
    /      \
Post E    Post A   <--- MyProduct unlocks post A directly
          /   \
      Post F  Post C  <--- F & C are unlocked indirectly
everyone who is subscribed to Myproduct..
- still has access to gated content in post A, because the product unlocks A directly
- loses access to gated content in posts B and E because they're no longer descendants of A
- gains access to gated content in post F because it's now a descendant of post A
This behavior gives you lots of flexibility for providing access to content. For example, if you've published a bunch of recipes, organized into three cook books...
Cookbook 1
  - Breakfast
    - eggs & bacon
    - avacodo & toast
    - buttermilk biscuits
  - Lunch
    - club sandwich
    - turkey sandwhich
    - blt sandwhich
  - Dinner
    - smash burger
    - lasagna
    - chicken parmesan

Cookbook 2
  - Breakfast
    - pancakes
  - Lunch
    - fried catfish
    - shrimp poboy
  - Dinner
    - turkey burger
    - cheese burger
    - fajitas

Cookbook 3
  - Breakfast
  - Lunch
  - Dinner
    - portobello mushroom burger
    - stir fry
    - fried shrimp
you could
- create a product to unlock all cookbooks and
- create three products to unlock cookbooks 1, 2, and 3 respectively and
- create a product to unlock all lunch recipes and
- create a product unlock all burger recipes
Prices
Each product can have up to four prices:
- a monthly price
- a quarterly price (every three months)
- a yearly price
- a lifetime price